
AWS S3 Lifecycle Management
tLifecycle Management is used so that objects are stored cost-effectively throughout their lifecycle. A lifecycle configuration is a set of rules that define the actions applied by S3 to a group of objects.

The lifecycle defines two types of actions:
Transition actions: When you define the transition to another storage class. For example, you choose to transit the objects to the Standard IA storage class 30 days after you have created them or archive the objects to the Glacier storage class 60 days after you have created them.
Expiration actions: You need to define when objects expire, the Amazon S3 deletes the expired object on your behalf.
Suppose a business generates a lot of data in the form of test files, images, audio, or videos and the data is relevant for 30 days only. After that, you might want to transition from standard to standard IA as storage cost is lower. After 60 days, you might want to transit to Glacier storage class for the longtime archival. Perhaps you want to expire the object after 60 days completely, so Amazon has a service known as Lifecycle Management, and this service exist within the S3 bucket.
Lifecycle policies:

Use Lifecycle rules to manage your object: You can manage the Lifecycle of an object by using a Lifecycle rule that defines how Amazon S3 manages objects during their lifetime.
Automate transition to tiered storage: Lifecycle allows you to transition objects to the Standard IA storage class automatically and then to the Glacier storage class.
Expire your objects: Using the Lifecycle rule, you can automatically expire your objects.
Creation of Lifecycle rule
Sign in to the AWS Management console.
Click on the S3 service
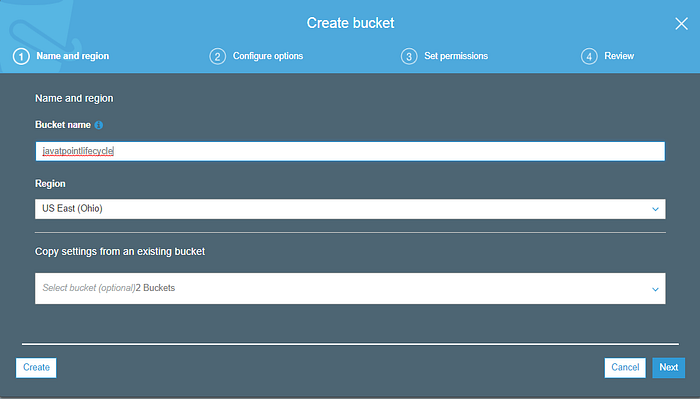
Create a new bucket in S3.
Enter the bucket name and then click on the Next button.
Now, you can configure the options, i.e., you can set the versioning, server access logging, etc. I leave all the settings as default and then click on the Next button.

Set the permissions. I leave all the permissions as default and then click on the Next button.

Click on the Create bucket button.
Finally, a new bucket is created whose name is “XYZ”.

Click on the XYZ bucket.

From the above screen, we observe that the bucket is empty. Before uploading the objects in a bucket, we first create the policy.
Move to the Management tab; we use the lifecycle.

Add the Lifecycle rule and then enter the rule name. Click on the Next.

You can create the storage class transition in both the current version and the previous version. Initially, I create the transition in the current version. Check the current version and then click on the Add transition.
First transition: 30 days after the creation of an object, the object’s storage class is converted to the Standard Infrequently access storage class.
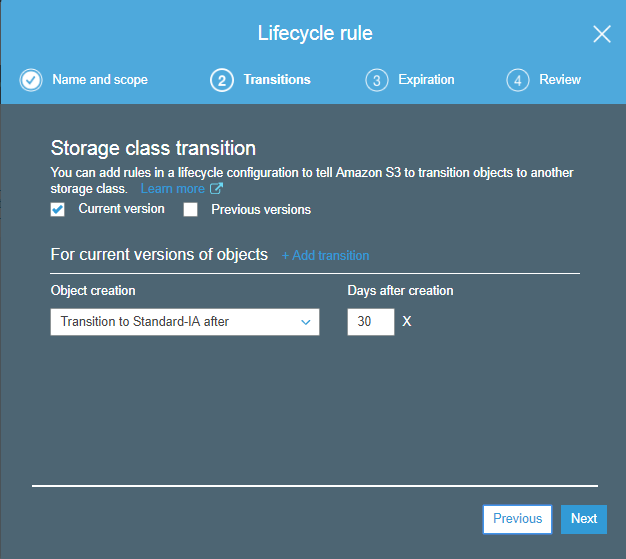
Second transition: 60 days after the creation of an object, the object’s storage class is converted to Glacier storage class.

Similarly, we can do with the previous version objects. Check the “previous version” and then “Add transitions”. Click on the Next.

Now, we expire the object after its creation. Suppose we expire the current and previous version objects after 425 days of their creation. Click on the Next.

The Lifecycle rule is shown given below:

Click on the Save.

The above screen shows that “Lifecyclerule” has been created.
Important points to be remembered:
It can be used either in conjunction with the versioning or without versioning.
Lifecycle Management can be applied to both current and previous versions.
The following actions can be done:
Transition to Standard Infrequent Access storage class (after 30 days of creation date).
Transition to Glacier storage class (after 60 days of creation date).
It can also delete the objects permanently.
Last updated